Manufacturer · Fashion & Home Accessories
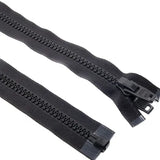
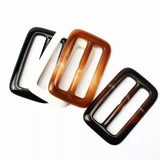
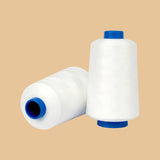
Buttons most often fall off for five reasons: weak or unsuitable thread, missing thread shank, unreinforced fabric, sharp edges on buttonholes that cut the thread, and too few stitches or unlocked seams. If you know how to sew a button correctly – with strong thread, a shank matching the button thickness, reinforcement behind, and a locked stitch end – it will last the garment’s lifetime. In production, the same is achieved by choosing the right button, machine, and tension control.
The Five Reasons Buttons Fall Off
1. The Thread
Thin cotton thread for hand sewing or basic seams is not designed to withstand button stress. It wears through in the holes and breaks at the first strong pull. For buttons, stronger polyester or core-spun thread is used, and even thicker for workwear. Suitable options can be found in our sewing threads.
2. Missing Thread Shank
If the button is sewn tightly against the fabric, the button’s rim presses it, and each fastening bends the thread at an angle. This causes faster wear and puckering around the button. The shank – several wraps of thread between the button and fabric – absorbs this stress.
3. Unreinforced Fabric
The thread may be strong, but the fabric can tear around it. This happens with knits, thin fabrics, and single-layer materials. The solution is an interfacing patch in the placket or a small fabric piece on the inside.
4. Sharp Edges on Buttonholes
If the buttonholes are not smoothed, the edge acts like a knife and cuts the thread during movement. This is a button quality issue, not visible to the naked eye but felt with a fingernail or seen under magnification.
5. Insufficient Stitches and Unlocked Ends
Three to four passes through the holes are not enough. If the thread end is not locked, the seam gradually unravels – especially with chain stitch using a single thread, which unravels when the end is pulled.
How to Sew a Button Strongly by Hand
- Use double strong thread matching the fabric colour and knot the end.
- Start from the front side under the button to hide the knot.
- Place a toothpick on the button and sew over it – this creates a shank.
- Pass 6–8 times through each pair of holes.
- Remove the toothpick, pull the button upward and wrap the thread several times around the loops underneath.
- Pass the needle to the back side and lock with several small stitches and a knot.
How to Sew a Button on Trousers
The waistband button on trousers endures constant horizontal tension. Sew it through all layers of the waistband, with a shorter shank, and reinforce with extra stitches. For heavy fabrics, consider a jeans button with a rivet or a hook and eye, which do not rely on thread strength.
How to Sew a Button on a Coat
Coat buttons are large and heavy, and the placket is thick. A longer shank and a backing button on the inside are needed to distribute stress and protect the fabric. Both buttons are sewn simultaneously with the same stitches, and the thread is wrapped around the shank of the front button. If the button has a shank, the thread passes through its eye, and the shank length is extended with wraps. This way, the weight does not hang on just a few fabric threads.
Production Measures Against Buttons Falling Off
| Risk | Measure in the Workshop |
|---|---|
| weak thread | separate, stronger thread for buttons specified |
| too few stitches | machine program with set stitch count and locking |
| unravelling | bar tack stitch instead of chain stitch or additional locking |
| torn fabric | placket interfacing, reinforcement under button |
| missing shank | machine for wrapping shank on jackets and coats |
| sharp holes | incoming button quality control and approval samples |
| hidden defects | tensile test on sample from each batch |
Button Choice Also Matters
Not all garment buttons behave the same under stress:
- Polyester buttons are lightweight and flexible; their holes are smoothed by polishing – a good choice for mass production.
- Urea buttons are hard and heat resistant, suitable for ironing and industrial washing – ideal for uniforms and workwear. See urea buttons.
- Metal buttons with shank must have smoothed eyes without sharp edges.
- Natural buttons (corozo, mother-of-pearl, horn) require more careful hole inspection.
- Hole size must match thread thickness: too small holes don’t allow enough passes, too large holes let the button wobble.
Care Tips to Extend Button Life
- Fasten buttons before washing to prevent catching in the drum;
- Turn the garment inside out;
- Do not iron directly on buttons – heat damages some materials and thread;
- At the first sign of loosening, reinforce the button before it falls off and gets lost;
- Keep spare buttons supplied with the garment.
Checklist for Brands
- Specify the type of thread for buttons in the technical specification.
- Determine stitch count and seam type.
- Require a shank for jackets, coats, and heavy fabrics.
- Inspect buttonholes during incoming quality control.
- Test tensile strength on samples after washing.
- Include spare buttons with higher-end garments.
Buttons That Don’t Fall Off – From Polkom
Polkom is a manufacturer of accessories for fashion, footwear and bags, perfumes and cosmetics, packaging and furniture accessories, with over 30 years of experience and headquarters in Sofia. We produce buttons with smooth holes and precise dimensions for machine sewing, OEKO-TEX® certified, and all metal parts are nickel free. If you have problems with buttons falling off, send a garment sample in a request – we will propose the right button and samples for testing.