Manufacturer · Fashion & Home Accessories



Contents
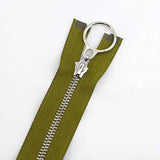
How to put a slider on zip by the metre: cut the length you need, separate the two tapes at one end by 3–5 cm, insert them simultaneously into the wide end of the slider (the face of the slider towards the face of the zip), line up the ends and pull the slider until the coils engage. Finally fit top stops so that the slider cannot come back off.
What you need
- continuous coil zip by the metre in the required size;
- sliders for the same size and type of chain (standard or reverse coil);
- top stops or thread for a cross seam;
- sharp scissors or a hot knife for polyester tape;
- flat pliers (for metal stops);
- a tailor’s marker and a ruler.
The most common reason a zip “won’t catch” is an incompatible slider. Before you start, check the number printed on the back of the slider and compare it with the chain size. Sliders for nylon coil zips do not work on moulded or metal zips of the same size.
How to put a slider on a zip – step by step
- Measure and cut. Measure the length of the opening plus 3–4 cm extra for the seams at both ends. Cut at right angles to the zip; with polyester tape a hot knife seals the end.
- Separate the end. At one end, pull the two tapes apart by hand for 3–5 cm. If the coil is tight, separate it carefully with your fingers without bending it sideways.
- Orient the slider. The slider has a wide end with two channels and a narrow end with one. Remember the rule: the wide end always points in the direction in which the zip closes. The pull tab must be on the face side – where it will be seen when worn.
- Insert both tapes at the same time. Push each tape into its own channel of the slider – the left into the left, the right into the right. It is important that both go in to the same depth.
- Line up the ends. Hold the two tapes together just below the slider so that their ends are level.
- Pull the slider. While keeping the ends level, move the slider along the chain until it reaches the point where the coil is closed. The ends coming out of the narrow end must be engaged evenly, with no offset.
- Check. Open and close the zip along its full length. If there is a wave or a skipped tooth, remove the slider and repeat.
- Close the ends. Fit top stops or sew several dense stitches across.
How to fit two sliders
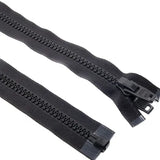
A two-way zip from a roll is made the same way – one slider from each end of the cut zip. Orientation is what matters, and it follows the same rule: the wide end points in the direction of closing.
Sliders meet in the middle when closing
Typical for suitcases, covers and bags with a large opening: the zip opens at any point by moving the sliders apart. Here the wide ends of the two sliders face each other, towards the middle of the zip.
Sliders close towards the ends
Suitable when you want an opening in the middle or access from both ends – for example on sleeping bags and some covers. Here the wide ends face outwards, each towards its own end, and when the zip is fully open the two sliders sit next to each other in the middle.
In both cases check the position of the pull tabs – both must be on the face side.
Stops: metal, heat-sealed or stitched
| Type | How it is fitted | When it is suitable |
|---|---|---|
| Metal top stop | A clip pressed onto the coil with pliers or a press | Garments, bags, visible ends |
| Heat-sealed stop | Plastic welded on by machine | Series production |
| Cross seam | Several dense stitches through both tapes | An end that goes into a seam of the product |
If the zip will be sewn in so that both ends pass through a cross seam of the product, separate stops are not essential – the seam takes over their role. However, the seam must be dense enough to stop the slider.
Common mistakes and how to avoid them
- The slider is upside down. The zip looks closed, but the pull tab is on the inside. Remove the slider and fit it again.
- Offset by one tooth. The two tapes were not lined up – the zip twists and a “step” remains at the end. Cut off the uneven end and start again.
- Wrong slider type. A reverse coil needs a reverse coil slider. A standard one either will not go on or will not close.
- Too little spare tape. Without 1.5–2 cm of tape beyond the stop, the end is hard to sew in.
- Squeezed slider. If the slider has been deformed with pliers, its jaws no longer work evenly. It is better to replace it.
Tips for series production
In large runs, threading sliders by hand is slow. Garment factories use simple jigs (guide combs) that separate the two tapes and feed them into the slider simultaneously, as well as presses for top stops. Organise the process so that cutting, threading and closing the ends are done at one workstation – this reduces rejects caused by misaligned tapes.
For logo pulls and decorative pullers, see the zip pullers – they attach to sliders without a fixed pull. For the full range, see zips.
Sliders and zip by the metre from Polkom
Polkom is a manufacturer of accessories for fashion, furniture, footwear and bags, based in Sofia. We supply continuous coil zip by the metre together with compatible sliders and stops, as well as custom sliders and pulls with a logo. We send samples so that you can check the combination before the production run. Write to us via the inquiry form with the zip size, colour and number of sliders.
Share this article