Manufacturer · Fashion & Home Accessories


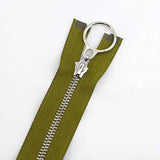

The most common mistakes when sewing an invisible zip are: a seam that runs too far from the coil, so the zip shows; a bubble or pucker at the bottom end; waist and seams that do not match on the two sides; waves on thin and stretchy fabrics; and a slider that catches the lining. Almost all of them can be avoided with three things – a coil unrolled with the iron, reinforced seam allowances and an accurate finish to the seam below the zip.
Sewing an invisible zip – why mistakes are so visible
An invisible zip is designed to be invisible. That is why every inaccuracy that would go unnoticed with an ordinary zip is immediately visible here: a slight deviation of the stitch, a difference in colour, a small bubble at the end. The good news is that the causes are few and well known. Below are the most common problems, their causes and solutions.
1. The invisible zip shows
Symptom: the coil or the edge of the tape shows on the right side, especially when moving or sitting.
Causes:
- the coil was not unrolled with an iron before sewing;
- the stitch runs 2–3 mm from the coil instead of in the groove itself;
- a standard foot was used instead of an invisible zip foot;
- the garment is too tight and the seam opens under strain.
Solution: unroll the coil with a cool iron, use an invisible zip foot and check that the groove matches the coil size. For tight styles, widen the pattern instead of relying on the zip to "hold" the garment. If the zip still shows slightly, choose a tape that matches the fabric as closely as possible.
2. A bubble at the bottom of the invisible zip
Symptom: a small bulge or fold forms below the zip, where the ordinary seam begins.
Causes:
- the seam below the zip starts too far from the last stitch of the zip – to the side or lower down;
- the seam below the zip is at a different distance from the edge than the zip seam;
- the zip tape was not moved aside when finishing the seam.
Solution: using a standard zip foot, start the finishing seam 1–2 mm above and slightly to the side of the last stitch of the zip, in line with it. Hold the end of the tape aside so that it does not go under the needle. Sew the first few centimetres slowly and check the right side.
3. The waist and seams do not match
Symptom: the waistband, the waist seam or the stripes of the fabric are offset on one side of the zip relative to the other.
Solution: after sewing the first side, close the zip and mark with chalk on the second tape the levels of all horizontal seams. Only then open the zip and sew the second side, following the marks. With striped or checked fabric, mark the lines of the pattern as well.
4. Waves and puckering on thin and stretchy fabrics
Symptom: the seam around the zip is wavy, and the fabric is puckered or stretched.
Causes: the fabric stretches more easily than the zip tape, the presser foot pressure is high or the tape was pulled while sewing.
Solution: stabilise both seam allowances with narrow fusible tape before sewing. Reduce the presser foot pressure, use a fine needle and do not pull the fabric. With satin and silk, thin paper under the fabric that is torn away after sewing helps.
5. The slider catches the lining or fabric
Symptom: when closing, the slider jams and catches material.
Solution: the lining and facing are sewn to the tape 3–4 mm from the coil, not right next to it. Trim excess allowances at the top so that they do not enter the slider area.
6. The invisible zip does not close or splits open
Symptom: the coil does not engage behind the slider or opens under load.
Causes:
- the coil was deformed by an iron that was too hot;
- the needle pierced the coil during sewing;
- the garment is too tight;
- the slider is damaged or unsuitable.
Solution: iron only at a low temperature and without steam directly on the coil. Make sure the needle passes in the groove, not through the teeth. If the coil is damaged, the zip must be replaced.
7. The zip is too short
Symptom: the garment is difficult to put on and the seam below the zip is under strain.
Solution: always choose an invisible zip 2–3 cm longer than the opening, because its lower end cannot be sewn in all the way. A longer zip is easily shortened at the bottom with a bartack.
8. The top end sticks out or is poorly finished
Solution: the top stop should be 3–5 mm below the line of the top seam so that it does not get caught in the waistband or facing. The ends of the tape are folded inwards at an angle under the facing and secured.
Mistakes in series production
In factories, organisational problems are added to those listed: zips from different batches with a slight difference in tone, mixed lengths in one box, an unclear specification for the position of the top stop. A well-prepared technical sheet with length, colour, position and a sample of a sewn-in zip prevents a large share of rejects.
Checklist before sewing
- The zip is the right length (+2–3 cm).
- The colour has been checked against the fabric in daylight.
- The seam allowances are stabilised and finished.
- The coil has been unrolled with a cool iron.
- An invisible zip foot is fitted and the needle is centred.
- The match marks are made on both tapes.
A quality invisible zip – half the battle
Even with perfect technique, an uneven coil, a stiff tape or a slider that jams make the result unpredictable. Polkom offers wholesale invisible zips with colour matching to a sample, original YKK invisible zips and sewing threads in matching shades. Send an inquiry – we will prepare samples for your fabrics.