Manufacturer · Fashion & Home Accessories


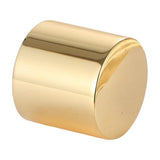

How to attach a cord end to a cord: first the end of the cord is cut and sealed – with heat for synthetics or with glue for cotton – then it is inserted into the cord end, which is crimped with a press or fixed with glue, and finally a pull test is done. The correct size of cord end and a well-sealed end matter more than the force of the press.
What you need
- Cord or lace cut to length
- Cord ends with an inner size matching the cord
- Sharp scissors or a hot knife for synthetics
- A lighter, hot knife or glue for sealing
- A hand or machine press with a suitable die (for crimp cord ends)
- Two-component or cyanoacrylate adhesive (for hollow-barrel cord ends)
- Thin thread or wire for pulling the cord through narrow cord ends
How to attach a cord end to a cord: the steps
1. Cut the cord
Measure the length of the finished cord and add the length that goes into the two cord ends. For synthetic cords use a hot knife – it cuts and seals at the same time. For cotton cords cut with sharp scissors, having first wrapped the spot with tape so that it does not fray.
2. Seal the end
This is the step that decides whether the cord end will hold. Polyester and polyamide cords are melted lightly until the end becomes hard and smooth. Cotton, viscose and blended cords are dipped in quick-drying glue and shaped with the fingers to make them narrower. Wait until fully dry.
3. Shape the end
If the cord is slightly thicker than the cord end, narrow it slightly – roll the sealed end between your fingers or trim it at an angle. Do not cut too much, because the cord end will grip less material.
4. Fit the cord end
With crimp cord ends, insert the cord all the way in and check that no fibres are sticking out. With narrow cord ends, pass a thin thread through the opening, tie it to the cord and pull it through. With hollow-barrel cord ends, apply glue inside and onto the end of the cord and insert with a slight twist.
5. Crimp or wait for the glue
Crimp models are pressed with a die that matches their diameter. The pressure must be enough to grip the cord, but not so much that it cuts it or deforms the cord end. When gluing, leave the cord upright until the glue has fully cured before putting any load on it.
6. Check
Pull the cord end with a force similar to that used when dressing and tying. It must not slip off, rotate freely or cut the cord at the edge. In series production this test is done on every batch and at every die change.
Specifics by type of cord
Braided polyester cords are the easiest to heat seal and the most predictable when crimped. Cotton cords are softer and bulkier – their ends must be stiffened with glue, otherwise the cord end slips off. Cords with a core have an inner filling that may shrink differently from the sheath; trim the core a few millimetres shorter so that the end goes in more easily. Flat cords and tapes require a flat cord end or folding the end before crimping.
Crimping or gluing
| Method | Advantages | Disadvantages |
|---|---|---|
| Crimping | Fast, no waiting, suitable for series | Requires a press and an exact die; risk of cutting |
| Gluing | Suitable for solid and decorative cord ends | Waiting for curing; the glue must withstand washing |
| Crimping + glue | Maximum strength | More time and cost |
Common mistakes
- Unsealed end. The fibres separate inside the cord end and it slips off after a few washes.
- Wrong size. A cord end that is too wide does not grip, while one that is too narrow cuts the cord.
- Too much pressure. The press cuts through the cord at the edge of the cord end – the cord breaks exactly there.
- Unsuitable glue. Some adhesives become brittle in the wash or soften with heat.
- No test. The problem only shows when the customer washes the garment.
Tips for series production
In large runs, cord ends are fitted with semi-automatic or automatic machines that cut, seal and crimp in one cycle. It is important that the machine is set up for the specific cord, because even a small difference in braid or thickness changes the grip. Order the cord ends and the cords together and do a test with the real material. If the cord also has a cord stopper, it is threaded on before the second cord end is fitted.
Quality control in the factory
Define a simple procedure for each shift: the first items are pull tested, the edges of the cord end are inspected for cracks and scratches in the finish, and with logo cord ends – for correct orientation. Keep an approved sample next to the machine as a reference. If the cord is changed to another batch, repeat the test, because even a small change in braid thickness affects the grip. Record the press settings for each type of cord – that way a repeat order starts without losing time.
How to replace a cord end at home
If the cord end of a finished garment has come off, the easiest thing is to cut off the frayed end, seal it with glue or heat and fit a new cord end with glue. Metal cord ends with a screw or a clip allow fitting without a press. Heat-shrink tubing is also a quick temporary solution.
Cord ends from Polkom
Polkom offers cord ends wholesale – crimp, hollow-barrel and decorative, metal and plastic, including with a logo. Send us a few centimetres of the cord so that we can select the exact size and make a sample. Write to us via the contact page.