Manufacturer · Fashion & Home Accessories
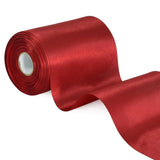

A satin ribbon bow is made by cutting a piece about 6–8 times the desired width of the bow, forming two loops, crossing them and tightening them with a central knot. For small, even bows use a fork as a template, and for series production a flat bow sewn in the centre. Cut the ends at an angle or into a „V“ and seal them.
What you need before you start
- satin ribbon – for bows visible from both sides choose double-face; single-face is suitable only if the back stays hidden;
- sharp scissors for textiles – blunt scissors crush the weave and the ends fray faster;
- a lighter, hot knife or anti-fray liquid for the ends;
- needle and thread in the colour of the ribbon, or a hot glue gun if the bow is to be attached;
- a template – a fork, cardboard or a board with two pegs when you are making many identical bows.
If you are still choosing the material, browse the available widths and colours in the satin ribbon category.
How to make a satin ribbon bow by hand – the classic method
- Cut ribbon of the required length (see the table below) and lay it right side up.
- Form a first loop with the left half and hold it between thumb and index finger.
- Pass the right half around the base of the loop from front to back.
- Push the middle of the right half through the opening formed to make a second loop.
- Hold both loops and pull evenly until the knot in the centre is tight and small.
- Even out the loops and the ends, then cut them to the same length.
The most common mistake is twisting the ribbon in the centre. With double-face ribbon this does not show, but with single-face the matte side comes to the front. If this happens, untie and turn the ribbon before passing the second loop.
A small bow made with a fork
This method is suitable for ribbons of 3–10 mm and gives identical small bows for lingerie, babywear and cards.
- Wrap the ribbon around the prongs of the fork so that the end stays at the front.
- Pass the free end from back to front through the middle gap between the prongs.
- Bring it over the top layer and back down through the same gap.
- Tighten the knot, slide the bow off the fork and cut the ends.
The width of the fork determines the size of the bow. For larger runs, workshops use a cardboard or wooden template with two pegs at an exact distance – so every bow comes out with the same span.
Double (multi-loop) bow
A double bow has four or more loops and is used for gift boxes and decoration. Wind the ribbon in a figure of eight around your fingers as many times as the loops you want, pinch the centre, tie it with a thin ribbon or wire and open the loops one by one, twisting them slightly to the side. For a fuller look, use ribbon 25 mm or wider.
Flat sewn bow for clothing
In garment production, bows are rarely tied – they are sewn. The reason is simple: a tied bow loosens in the wash, while a sewn one keeps its shape.
- Cut a piece for the body of the bow and fold it into a ring, with the ends overlapping in the centre.
- Pinch the centre and sew a few stitches to form a „bow tie“.
- Wrap a small piece of ribbon around the centre like a band and sew it at the back.
- If you like, add separate hanging tails under the bow.
This technique is used for lingerie, dresses, children's clothing and hanger loops. It gives the same result on every item and is easy to outsource to a factory.
What length and width of ribbon to choose
| Ribbon width | Use | Approximate length for one tied bow |
|---|---|---|
| 3–6 mm | lingerie, cards, babywear | 20–30 cm |
| 10–16 mm | clothing, small packaging, hair | 35–45 cm |
| 20–25 mm | gift boxes, hair clips | 50–70 cm |
| 38–50 mm | large boxes, decoration | 80–110 cm |
| 70–100 mm | chairs, cars, shop windows | from 120 cm upwards |
The values are approximate: the length depends on how big you want the loops and how long the tails. Before a run, make one test bow, untie it and measure the ribbon used – that is the most accurate consumption figure.
How to finish the ends
The cut ends of satin ribbon fray if they are not finished. The most common options are:
- angled cut at about 45° – simple and suitable for narrow ribbons;
- „V“ cut – fold the end lengthwise and cut diagonally towards the fold;
- heat sealing – polyester satin melts slightly and the end closes; work quickly so that it does not darken;
- anti-fray liquid – suitable for cotton and blended ribbons, which do not melt.
Tips for bows that look professional
- Keep the ribbon taut but do not stretch it – satin keeps its sheen when it is not crumpled.
- For elaborate decorations, combine satin with organza ribbon or denser grosgrain ribbon – this gives a contrast in texture.
- If the bow will be washed, choose polyester satin and a sewn construction, not glue.
- Check the colour in daylight – dark shades such as burgundy and navy look different under artificial lighting.
Satin ribbon for bows from the manufacturer
Polkom is a manufacturer of haberdashery and accessories for fashion, furniture, footwear and bags, based in Sofia. We deliver satin ribbon for bows in various widths and colours to ateliers and clothing and packaging manufacturers across the EU, as well as custom logo ribbons. Minimum quantities depend on the article. Send an inquiry or request a sample via the contact page.