Manufacturer · Fashion & Home Accessories



How to sew lingerie elastic: the elastic is placed on the right side of the fabric along the edge and sewn with a narrow zigzag while being stretched evenly; it is then turned to the wrong side and sewn a second time with a three-step zigzag or coverstitch. This keeps the edge soft, stretchy and cleanly finished, and the elastic is not visible from the outside unless it is decorative.
What you need
- Elastic – soft knitted elastic of a suitable width: 6–12 mm for leg openings, 8–20 mm for brief waistbands.
- Jersey needle – ball point or stretch, size 70–80 depending on the fabric.
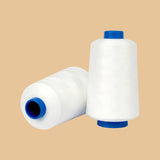
- Thread – polyester or polyamide, with good strength and stretch. Suitable ones are in the sewing threads category.
- Machine – a domestic machine with zigzag and three-step zigzag, or an industrial coverstitch or flatlock machine.
- Marker or pins – to divide the edge and the elastic into equal parts.
Preparation: length and tension distribution
The elastic is almost always shorter than the edge it is sewn to. The difference determines how closely the lingerie hugs the body. As a guide, leg elastic is 10–20% shorter than the edge, but the exact ratio depends on the stretch of the particular elastic and is checked on a sample.
The tension is not distributed evenly around the leg opening. At the front, along the groin line, the elastic is sewn with almost no stretch, while at the back, across the seat, it is stretched more – so the briefs give good coverage and do not ride up. At the waist the tension is usually even.
- Divide the fabric edge into four equal parts and mark them.
- Divide the elastic into four parts as well.
- If the tension is uneven, mark the zones of greater stretch on the elastic.
- Match the marks when sewing – this distributes the tension precisely.
How to sew lingerie elastic – the turn-and-stitch method
This is the classic method for brief leg openings and waistbands. The elastic stays hidden, or only its decorative edge shows.
First pass
- Place the elastic on the right side of the fabric, with its straight edge aligned with the cut edge.
- If the elastic has a brushed side, it should face up – after turning it will sit against the skin.
- If the elastic has a picot edge, it points inwards towards the garment.
- Sew with a narrow zigzag (width about 3 mm, short stitch length) close to the inner edge of the elastic.
- Stretch the elastic between the marks, but do not pull the fabric – the machine should feed it on its own.
Second pass
- Turn the elastic to the wrong side so the cut edge of the fabric is hidden under it.
- From the right side, stitch with a three-step zigzag, catching both the fabric and the elastic.
- Again stretch the elastic slightly so the seam does not break when the garment is put on.
- Check that the edge lies flat with no “waves”.
How to attach elastic in a single pass
In series production, single-pass attachment with a coverstitch or flatlock machine fitted with an elastic feeder is often used. The feeder maintains a constant, pre-set tension, and the stitch catches the elastic and finishes the edge at the same time. The method is much faster but needs to be set up for each type of elastic and each size.
An option for visible elastic – for example a wide boxer waistband – is to sew the elastic from the wrong side to the right side so that it stays entirely on the outside. In that case, choose an elastic with a decorative face and a soft inner side.
Joining the elastic into a loop
In lingerie, the ends of the elastic are usually caught in the side seam or the crotch seam – this is the strongest and least noticeable solution. If the elastic needs to be joined into a loop separately, the ends are overlapped by about 1 cm and stitched with a dense zigzag or a box with a diagonal. Do not join the ends with a right-sides-together seam with pressed-open allowances – it is bulky and scratches.
Machine settings
| Operation | Stitch | Approximate settings |
|---|---|---|
| First pass | Zigzag | Width 2.5–3.5 mm, length 1–1.5 mm |
| Second pass | Three-step zigzag | Width 4–6 mm, length 0.8–1.2 mm |
| Series attachment | Coverstitch or flatlock | Feeder with set tension |
| Joining into a loop | Dense zigzag | Overlap about 1 cm |
The settings are a guide – every machine and fabric needs a quick test on a scrap. Sew a piece of about 20 cm, stretch it fully several times and check that the seam stays intact, that the elastic returns to its original length and that there are no skipped stitches.
Common mistakes and how to avoid them
- Skipped stitches – use a jersey needle and change it more often; a blunt needle breaks the elastic threads.
- Seam breaks when putting on – a straight stitch does not stretch; use zigzag or coverstitch.
- Wavy edge – you are stretching the fabric instead of the elastic, or the tension is uneven.
- Elastic loses stretch after sewing – too dense a stitch with many needle penetrations weakens the elastic; increase the stitch length slightly.
- Brushed side facing the wrong way – the soft back must face up on the first pass.
Lingerie elastic and threads from Polkom
Polkom is a Bulgarian manufacturer of accessories for fashion, furniture, footwear and bags. We supply soft knitted lingerie elastic, picot-edge elastic and plush-back elastic, as well as threads for stretch seams, with delivery across the EU. If you are developing a new collection, send us the style and fabric via the contact form – we will select an elastic and send samples for test sewing.