Manufacturer · Fashion & Home Accessories
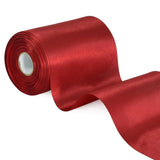

An organza bow is tied like an ordinary bow with two loops, but the ribbon is kept face out at every step and the knot is tightened twice, because organza is slippery. For a fuller look, several loops are made and gathered in the centre with thin wire or thread. The ends are cut at an angle or with a V-cut so that they do not fray.
How to tie an organza bow – preparation
Before you start, choose the right ribbon and prepare your work area. Organza forgives small mistakes, but it creases easily and changes direction if pulled hard.
- Width – for small pouches 6–15 mm, for boxes 20–25 mm, for decorative bows 38–50 mm and more.
- Edge – ribbon with a wired edge or a dense satin border keeps the loops upright; plain organza is softer and droops.
- Tools – sharp scissors (blunt ones chew the open weave), thin wire or strong thread, and a hot glue gun if needed.
How much ribbon you need
| Type of bow | Approximate length |
|---|---|
| Small bow for a pouch or favour box | 30–40 cm |
| Classic bow on a box (without wrapping round) | 50–70 cm |
| Wrapping a box crosswise + bow | 2 × (length + width + 2 × height) + 60 cm |
| Layered decorative bow with 6–8 loops | 1.5–2.5 m depending on size |
These are guidelines. Try one bow, measure the ribbon actually used and then calculate the quantity for the whole run.
Method 1: classic bow with two loops
- Pass the ribbon around the item or through the handles of the pouch and tie a simple knot, pulling it tight. Both ends should be the same length.
- Form a loop with the left end, folding it towards you. Make sure the face side stays out – with organza the difference is small, but with printed ribbon or a satin border it is visible.
- Bring the right end over the loop and push it through the resulting opening, forming the second loop.
- Pull both loops at the same time and evenly. Do not pull the ends – that makes the loops uneven.
- Tighten again, then adjust the loops with your fingers so that they are the same size.
Tip: to stop it coming loose, make the first knot a double one or put a small drop of clear glue in the centre of the knot on the back.
Method 2: double bow
A double bow has four loops and looks fuller. It is tied like the classic bow, but in steps 2 and 3 a double loop is formed instead of a single one – the ribbon is folded concertina-style into two loops and the whole thing is pushed through the knot. It takes a little more practice, but no wire is needed. Suitable for 25–40 mm ribbons.
Method 3: layered (florist) bow
This is the bow you see on bouquets, wreaths and wedding cars. It is not tied around the item but made separately and then attached.
- Leave a free end of about 20 cm – this will be one of the “tails”.
- Make a small circle in the centre (around your thumb) – it will cover the wire.
- Form a loop to the right, hold it with your thumb in the centre and give the ribbon a half twist so that the face side is on top again.
- Form a loop to the left, the same size. Another half twist.
- Repeat until you have 6–10 loops. Each loop can be slightly larger than the previous one.
- Pass thin wire through the centre circle, gather all the loops and tighten at the back by twisting the wire.
- Open out and turn the loops until the bow is round and full. Cut the second tail.
The half twist in the centre is key: if you skip it, half the loops will be wrong side up.
Method 4: wired ribbon bow
With ribbon that has wire built into both edges, any of the methods above can be used, but with one advantage: after tying, the loops are shaped with your fingers and stay that way. That is why it is preferred for shop windows, Christmas decorations and large bows over 5 cm. Note – do not cut the wire with fabric scissors, as it blunts them.
How to cut the ends
- Angled cut – the quickest option, at an angle of about 45°.
- Swallowtail – fold the end lengthways and cut at an angle from the fold to the edge. The result is an inverted V.
- Heat sealing – with polyester organza, the cut can be sealed with a hot knife; in series packaging this saves a lot of time.
Common mistakes
- Ribbon too narrow for a large item – the bow looks random and loses its volume.
- Pulling too tight – the organza gathers and the loops get crushed.
- Storing rolls unwrapped – dust is very noticeable on white organza.
- Mixing batches of different shades in one run of packaging.
If your organza looks too light for a particular package, try combining it with a dense satin ribbon – for example a narrow satin ribbon underneath and a wide organza on top. You will find all types and widths in the organza ribbon and ribbons categories.
Ribbons for series packaging from Polkom
Polkom manufactures and delivers ribbons for packaging, garments and decoration – organza in many colours, with different edges and widths, as well as dyeing to Pantone. If you are preparing a run of gift packaging and want to test several widths, send an inquiry via the contact page – we will offer suitable samples.