Manufacturer · Fashion & Home Accessories
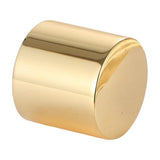
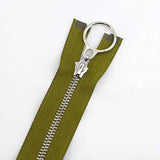
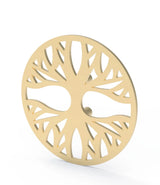

Metal buttons with a logo are made by transferring the logo into a die or casting mould and reproducing it in relief during stamping or casting, or by applying it to a finished button by laser engraving. The button then receives its finish and, if required, enamel in the brand colours. The process runs through file preparation, a sample for approval and serial production.
Techniques for a logo on a metal button
Raised and debossed logo
The logo is made in the die and appears raised or recessed in the metal during production. This is the most durable option – the logo is part of the button and cannot wear off. On cast zinc alloy buttons the relief can be deep and multi-level, while on stamped brass buttons it is shallower but very crisp.
Laser engraving
The laser removes the top layer of the finish and reveals a different tone underneath, or marks the metal itself. It does not require a new die, so it is convenient for smaller quantities, for personalising standard styles and for a quick sample. You will find more about this technique in engraved buttons.
Enamel and colour fill
The recessed areas of the logo are filled with coloured enamel. This way the mark appears in the brand colours – suitable for uniforms, club blazers and sports kits.
Lettering around the rim
The brand name runs around the edge of the button, while the centre stays smooth or carries a small mark. A solution that is especially popular on jeans buttons.
How metal buttons with a logo are made
- Brief. You state the type of garment, the button size, the attachment method (shank, holes, tack), the material, the finish and an approximate quantity.
- Logo file. You send the logo in vector format – AI, EPS, PDF or SVG. A raster image is only useful as a reference.
- Technical drawing. The manufacturer prepares a drawing of the button with the dimensions, the depth of the relief and the position of the logo and sends it to you for confirmation.
- Die or mould. After approval the tool is made. It is a one-off investment that is also used for subsequent orders.
- Sample. Trial buttons are made in the chosen finish. You check them in person, on the garment fabric.
- Production run. After written approval of the sample, serial production, inspection and delivery begin.
How to prepare the logo
- Simplify the details. On a 15 mm button, very fine lines and small text merge together. Sometimes it is better to use only the symbol without the wording.
- Think about line thickness. For relief, lines must have a minimum thickness to reproduce clearly.
- Convert text to outlines. In the vector file, turn the lettering into curves so the font cannot be substituted.
- Prepare versions for different sizes. The sleeve button is smaller than the front button and may need a simplified version.
- Give the colours as Pantone references if there is enamel.
Which metal buttons take a logo best
| Button type | Recommended technique | Note |
|---|---|---|
| Shank button for a blazer or coat | relief, enamel | the entire face is free |
| Jeans tack button | relief, lettering around the rim | preferably a fixed (non-rotating) style |
| Button with holes | laser engraving, shallow relief | the holes limit the area |
| Standard stock button | laser engraving | no new die |
How many logo buttons to order
When calculating the quantity, count the buttons by size for one garment – front, sleeves, pockets, epaulettes, inside buttons – and multiply by the number of garments in the run. Add a reserve for rejects during attachment and spare buttons to be attached to the garment. If you plan several collections with the same die, it is wise to discuss the annual quantity with the manufacturer, as this affects production planning. Minimum quantities depend on the article and the technique – send an inquiry.
Logo and finish – how they affect each other
The same logo looks different in different finishes. On glossy nickel colour (nickel free) the relief is visible mainly through reflections and can “disappear” in certain light. With an antique finish the recesses darken and the logo stands out clearly. A matte finish softens the details. So if the logo is fine, choose antique or a contrasting enamel to emphasise it.
What determines the price
The price depends on whether a new tool is needed, on the size and the metal, on the complexity of the relief, the number of finishes and enamel colours, and on the quantity. The investment in a die is spread across all batches, so for repeat orders the unit price is usually more favourable. For specific figures, send a request for a quote.
Common mistakes when ordering logo buttons
- Sending a low-resolution logo instead of a vector.
- Too much detail for the small size.
- Approval only from a photo, without a physical sample.
- Not coordinating the finish with the other metal parts – zips, eyelets, metal logo plates.
- A rotating button with an asymmetric logo that ends up crooked.
Metal buttons with a logo for uniforms and corporate wear
On uniforms, the logo or crest is part of the institution's identity, so consistency over the years is essential. Keep the approved sample and the technical drawing and refer to them with every new order. Also consider removable buttons with a split ring if the garments are professionally cleaned.
Browse the main styles in the metal buttons category.
Made by Polkom
Polkom manufactures metal buttons with a logo to the customer's design – with relief, engraving, enamel and a finish of your choice. We work with brands, sewing factories and ateliers across Europe, make samples quickly and deliver across the EU. Send the logo and a description of the garment via the contact page and you will receive a proposal and a quote.