Manufacturer · Fashion & Home Accessories



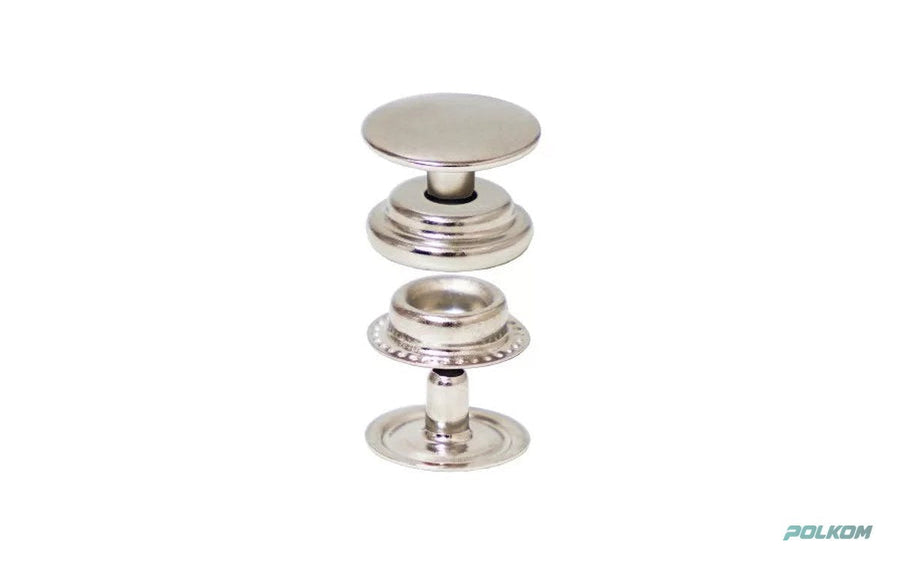
Snap buttons are removed by breaking the riveted part on the wrong side: on post snaps the socket or stud is cut or broken off with sharp cutters, on prong snaps the prongs are bent open with a thin screwdriver, and plastic snaps are cut at the post. If you are wondering how to remove snap buttons without tearing the fabric, the key is to work from the inside, slowly and with a support underneath, and then to reinforce the spot before fitting a new press stud.
When replacement is needed
- the snap does not click or comes undone by itself;
- the cap is dented, scratched or rusty;
- the snap rotates freely or hangs loose;
- you are changing the model or colour when reworking a garment;
- a snap fitted incorrectly in production that has to be corrected.
What you need
- sharp side cutters with thin jaws;
- a thin flat screwdriver or knife for bending prongs;
- small pliers;
- a support – a small board or a rubber mat;
- interfacing or tape for reinforcement if the hole has widened.
How to remove snap buttons with a post
- Turn the fabric over. Work from the wrong side, where the socket or stud is. The cap and post on the outside are just a "head", and the riveting is at the back.
- Grip the socket. Place the jaws of the cutters under the rim of the socket, between it and the fabric.
- Cut or break it off. With several small movements, cut the rim of the socket or the flared post. The socket will come off and the post of the cap will be free.
- Remove the cap. Pull the cap out from the right side. If the post is flared, bend it straight with pliers before pulling it out.
- Repeat for the lower part – the post and the stud.
Make sure the cutters do not catch the fabric. It is better to cut in several goes than with one strong movement that tears the material.
Removing open prong snaps
These snaps have no post but a ring with prongs that are bent over the inner ring. Insert a thin screwdriver under each prong and carefully straighten it. When all the prongs are straight, the two parts separate. Knitted fabric is usually not damaged, because the prongs push the yarns apart rather than cutting them. If loops have come undone, secure them with a few stitches or a small piece of interfacing on the inside.
Removing plastic snaps
With plastic snaps, the post passes through the fabric and is flattened on the other side. Cut the cap or the flattened part with cutters or a scalpel just above the fabric. You can also warm the plastic slightly, but do not use an open flame near textiles. Then remove the remaining part.
Fitting a new snap in the same place
The old hole is often larger than necessary. If you fit the new snap straight in, it will "float" and soon fall out. Therefore:
- reinforce the spot on the inside with a piece of interfacing or strong tape;
- choose a snap with a wider base or a cap that covers the old mark;
- if necessary, shift the position of both the upper and lower parts slightly so you are working on sound fabric;
- use the correct die and a post of the right length.
Detailed fitting steps are in the article on how to attach snap buttons.
Repairing a snap button that does not click
| Symptom | Likely cause | Solution |
|---|---|---|
| Does not fasten | the stud is deformed or the parts are not aligned | replace the lower pair, position accurately |
| Comes undone by itself | weakened or broken spring in the socket | replace the upper pair |
| Very hard to unfasten | the spring is too strong for the product, or there is rust | model with a softer spring, cleaning or replacement |
| The cap rotates | insufficient riveting or a large hole | remove, reinforce, new snap |
| Rust stains around the snap | steel parts with a damaged finish | replace with brass or stainless material |
Limited corrections, such as lightly squeezing the socket with pliers, sometimes help temporarily, but usually the snap starts coming undone again. The reliable solution is replacement.
Replacing snaps on leather and thick materials
On leather jackets, bags and denim, removal is more difficult because the post is long and firmly flared. Work with heavier cutters and a support, protecting the right side with a piece of fabric so the tool leaves no mark. Leather does not recover like textile – a widened hole stays visible, so the new snap must have a cap that covers the old mark. With thin leather, add a leather or strong interfacing backing on the wrong side. If the snap is in a visible place on an expensive product, it is wiser to have an atelier with the right dies do the replacement.
Corrections in production
In the factory, incorrectly fitted snaps occur with a new die, a new material or an inaccurate template. Set the defective products aside, remove the snaps as described and analyse the cause – post length, hole, press force. One corrected setting saves dozens of repeat repairs. For products where repeated replacement is likely, consider an alternative closure, such as hook and loop.
Spare snaps and kits
For repair ateliers it is useful to keep a stock of several sizes and finishes, together with the corresponding dies. If the garment also has eyelets, check them during the same repair – see the eyelets in our range. You will find new snaps in the snap buttons category.
Snaps and services from Polkom
Polkom is a Bulgarian manufacturer of snap buttons and metal accessories. We offer snaps in various sizes and finishes, as well as an attaching service. Contact us via the contact page.