 Manufacturer · Fashion & Home Accessories

Contents
A mother-of-pearl button is sewn on like an ordinary sew-through button, with three refinements: use a fine needle that passes freely through the hole, do not pull the thread fully tight, and form a thread shank so the button does not press against the fabric. Stitching that is too tight, a thick needle and pressure during ironing are the main reasons mother-of-pearl cracks around the holes. Below we describe how to sew on a mother-of-pearl button by hand and by machine.
Why mother-of-pearl needs care when sewing
Mother-of-pearl is a hard but brittle material. The holes in the button are drilled into layered calcium carbonate, and their edges are more vulnerable than those of a plastic button. If the needle is thicker than the hole, if the thread is pulled very tight or if the button knocks against a hard surface during sewing, a fine crack can start from the hole. It is often not noticed straight away but widens at the first wash or ironing. Correct technique saves complaints.
What you need
- needle – a fine hand-sewing needle (e.g. size 9–10) or a machine needle matched to the button holes;
- thread – polyester or cotton shirt thread matching the fabric; for hand sewing a stronger button thread can also be used;
- spacer – a pin, toothpick or thin knitting needle used to form the shank;
- thimble – for comfort with dense fabrics;
- marker or chalk – to mark the position.
How to sew on a mother-of-pearl button by hand
- Mark the position. Close the placket and mark the button position through the buttonhole – usually at the top end of a vertical buttonhole or at its centre.
- Secure the thread. Thread a double strand and make two or three small stitches on the right side, under the future button, instead of a big knot.
- Place the spacer. Lay the pin on the fabric between the holes. It will leave a gap between the button and the fabric.
- Sew through the holes. Pass the needle 4–6 times through each pair of holes without pulling hard. The needle should pass freely; if it sticks, change to a finer one.
- Form the shank. Remove the pin, lift the button and wrap the thread several times around the stitches under it. This creates a stem about as tall as the fabric at the buttonhole is thick.
- Fasten off. Take the needle to the wrong side and make a few small securing stitches. Cut the thread.
Cross or parallel stitching
With a four-hole button you can sew in two parallel lines (=) or crosswise (X). Parallel stitching is the classic option on shirts and spreads the pressure evenly. Cross stitching is slightly stronger, but the thread builds up in the centre and, on very thin mother-of-pearl buttons, increases the pressure between the holes. Some shirtmakers also use a “crow’s foot” stitch as a mark of handwork. Choose one option and keep to it for the whole garment.
Machine sewing in production
In series production, buttons are sewn on with specialised machines using a chain stitch or lockstitch. With mother-of-pearl, pay attention to the following:
- set the hole spacing exactly to the button – with a natural material, check every new batch;
- choose a needle of suitable thickness so it does not enlarge the holes;
- reduce the thread tension compared with the setting for plastic buttons;
- check that the machine’s button clamp does not squeeze the button too hard;
- if needed, use machines with a shank-wrapping function.
Test the settings on a few buttons from the batch and inspect them with a magnifier for cracks around the holes before starting the run.
Which thread to choose
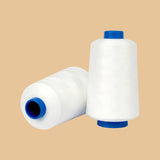
For shirts and blouses, polyester thread of a suitable weight for buttons is most common – it is strong, does not shrink and withstands washing. Cotton thread is traditional on made-to-measure shirts and dyes well, but is less resistant to abrasion. For silk, choose a finer thread in a matching tone. Browse the range of sewing threads and the entire threads category.
Why mother-of-pearl buttons crack
| Cause | How to avoid it |
|---|---|
| Needle too thick | a needle that passes freely through the hole |
| Thread pulled too tight | moderate tension, a thread shank |
| Ironing over the button | a towel under the placket, iron around the button |
| Knocking against the washing machine drum | fasten and wash inside out, use a laundry bag |
| Very thin button for a dense fabric | a thicker button or trochus instead of freshwater shell |
Shank buttons and decorative styles
Larger mother-of-pearl buttons for jackets, waistcoats and coats sometimes have a metal or mother-of-pearl shank underneath. They are sewn through the shank with a few stitches, with the button oriented so that the shank is parallel to the buttonhole – then the button lies flat and does not flip. No thread shank is needed here, but on thick wool fabrics it is a good idea to add a small backing button on the wrong side to take the strain and protect the fabric from tearing. Decorative buttons with no function are sewn on more lightly, but also without excessive tension.
Spare buttons
Sew one or two spare buttons from the same batch onto the inside seam of the shirt or attach them in a small bag to the label. That way, if a button is lost or damaged, the customer will have one of the same shade – especially important with natural mother-of-pearl, where different batches are never completely identical.
If you are selecting buttons for a new collection, browse the mother-of-pearl buttons category.
Polkom: buttons and button attaching services
Polkom is a Bulgarian manufacturer of accessories for fashion, furniture, footwear and bags. Besides mother-of-pearl buttons and threads, we also offer a service for attaching buttons and accessories, as well as advice on choosing the right model. Get in touch via the contact page.
Share this article


